Application of One Piece Halo Hair Extensions

Step-by-Step Instructions For How To Put In One Piece Halo Hair Extensions
One Piece Hair Extensions – never have hair extensions been this easy to use! Do you dream of wonderfully thick, silky, long hair? But are you concerned that using hair extensions will be too much of a hassle? Now this worry can be a thing of the past because our Halo Hair Extensions. You don't need to be a professional to apply these. In fact, thanks to the one piece band, these are the easiest to attach hair extensions. You do not have to align any clips nor do you have to handle an iron to glue the extensions. The following step-by-step instructions will show you how unbelievably easy it is to create your dream ‘do. We also provide a video tutorial so you'll be able to flip-in your one piece extensions like a pro!

Step 1: Horizontally part the upper part of your hair just above the hairline on your forehead and put it up. This way you will be able to determine the optimal thread length of your hair extension.
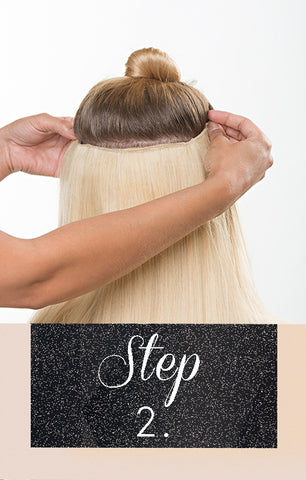
Step 2: Place the thread of the extension around your head and adjust the length to your head circumference. Tie the thread to the end band and fasten it to the selvage.
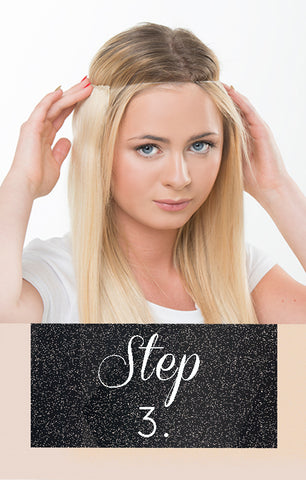
Step 3: Let down the parted hair. Place the hair extension, which is now perfectly fitted to you, on top of your hair on the above-mentioned line just behind the hairline.
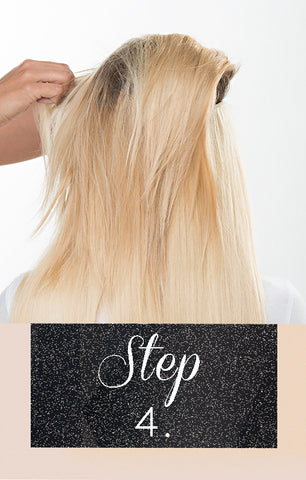
Step 4: Using a tail comb, comb your own hair over the base of the extension to cover it. This way, your little secret will disappear underneath your own top hair and you will look marvelous with breathtakingly beautiful hair.